

AI Photoshoots: How to Write Prompts That Get Great Images
How do you choose a source photo, write a clear prompt and control appearance, lighting and angle? Here's everything you need to know to make AI photoshoots look professional and still resemble the real person.
You no longer need a photographer, a studio and a location to produce striking photos: AI can put you on a fashion magazine cover or on the streets of Tokyo. But getting a beautiful frame where you still look like yourself is harder than it seems. The model changes facial features, gets details wrong and sometimes interprets even detailed instructions far too creatively.
For businesses, AI photoshoots are a fast way to produce images for campaigns, social media and landing pages. In this guide we cover:
- what AI photoshoots are and the main ways to work with an image;
- which tools to use;
- how to build a prompt step by step;
- how to preserve the person's appearance from the source photo;
- how to define lighting, angle, lens and style;
- how to choose a good source photo and fix a poor result.
What AI photoshoots are and how they work
An AI photoshoot means creating or editing images with an AI model: the model receives a text description, and sometimes a source photo too, and produces a new image that looks like the result of a real photo session.
Writing prompts has become much simpler, and even beginners pick it up quickly. Modern models understand ordinary sentences and treat them like a professional brief rather than a list of comma-separated tags. Some services already work like a generative photo editor, with sliders that let you change parameters without writing a prompt at all.
There are three main ways to work with images using AI:
Generating an image from scratch
You describe the future frame in text: the person's appearance, clothing, pose, background, lighting and photographic style, and the model creates the image on its own. If you need a portrait of a specific person, a text description alone usually isn't enough: the model needs photos of that person to work from.
A variation based on a reference photo
You upload a source photo and the model uses it as a reference point. For example, you can keep the facial features and change the clothing, pose, background or photographic style. The result won't be an exact copy of the original: with every generation, the model is essentially creating a new image.
Editing an existing photo
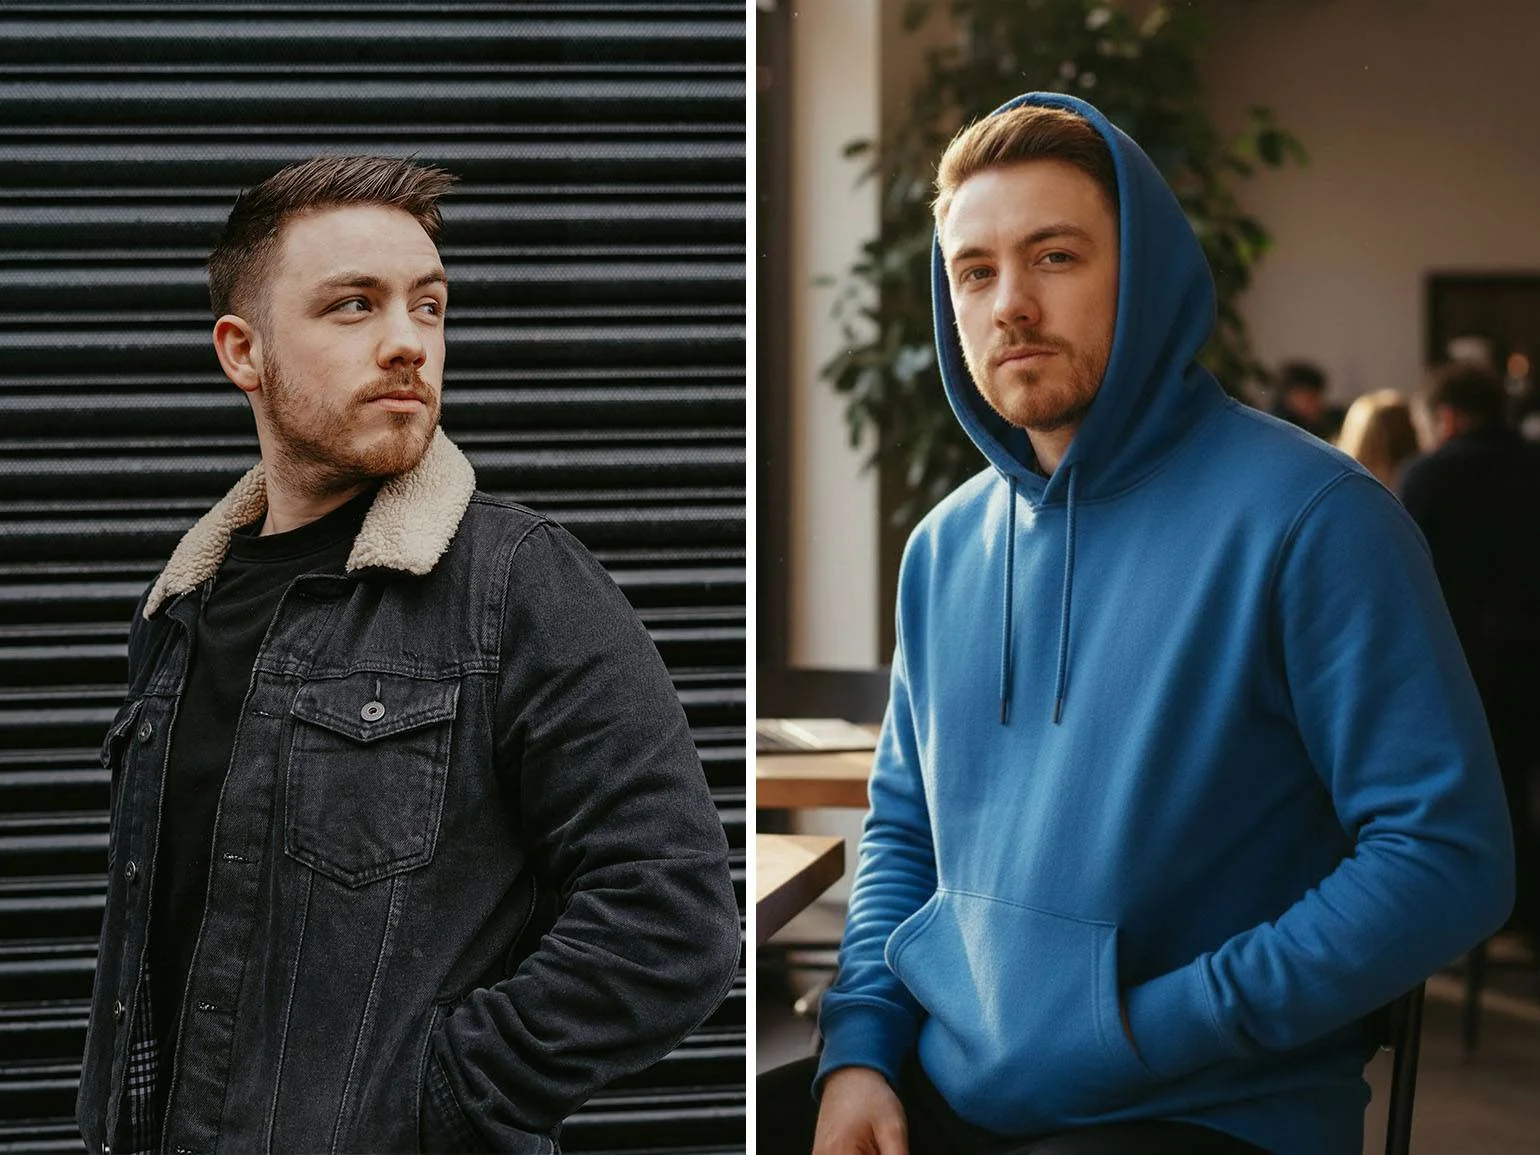
The model changes specific parts of an image that already exists: it removes an object from the frame, replaces the background, changes a garment or hairstyle, or extends the image beyond the original frame.
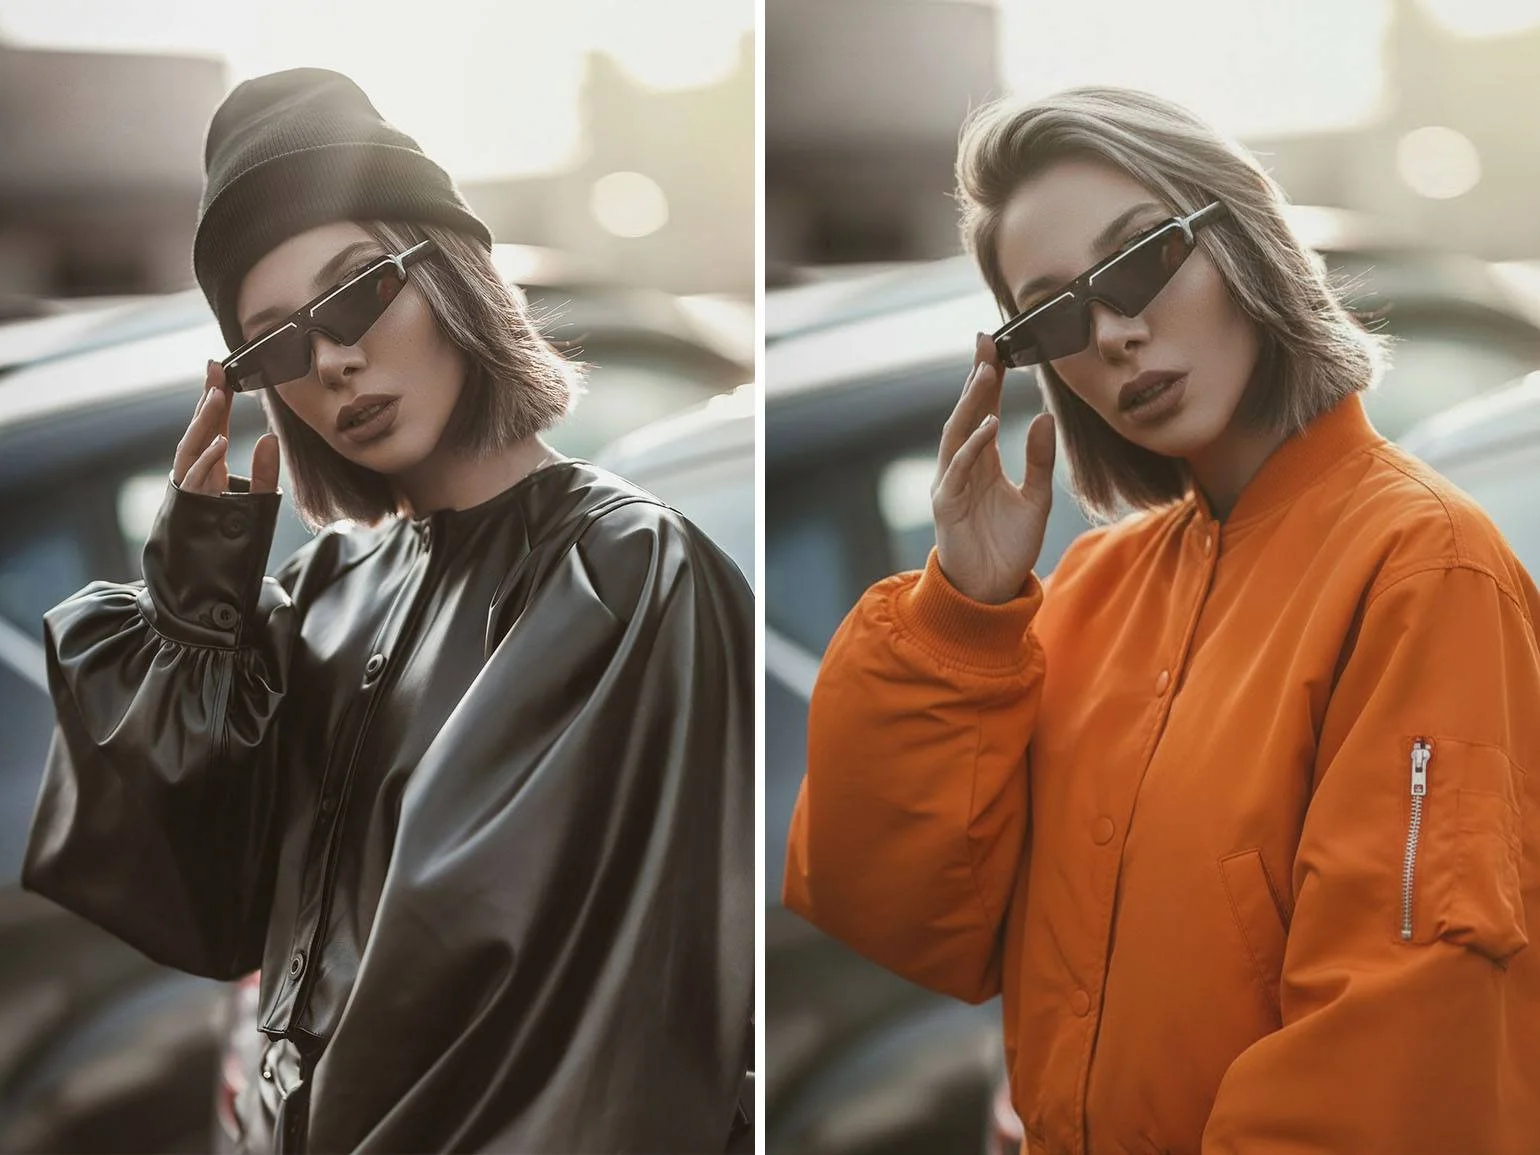
The result depends on the model you choose, the quality of the reference photos and how precise your request is. Different models preserve faces, proportions, clothing and small details to different degrees, so check every finished image carefully: does it resemble the original, and are there any distortions?
Which tools to use for AI photoshoots
You can create AI photoshoots both in general-purpose chatbots and in image-focused services. They handle references, appearance, pose and style differently, and reproduce the source photo with different levels of accuracy.
- For getting started: multimodal tools like ChatGPT with OpenAI's image generator, Gemini with Nano Banana, and Grok. They're convenient and fast, but the result often looks more "amateur", and the likeness to the original isn't always complete.
- For professional work: Midjourney, Stable Diffusion, Ideogram, Adobe Firefly and Krea. Midjourney has dedicated parameters for keeping a character consistent with a reference photo, and in Stable Diffusion the ControlNet extension lets you control the person's pose and swap faces.
How to write a prompt for an AI photoshoot
A good prompt depends on a few things: which tool and model you're using, and whether the generation is based on a real source photo.
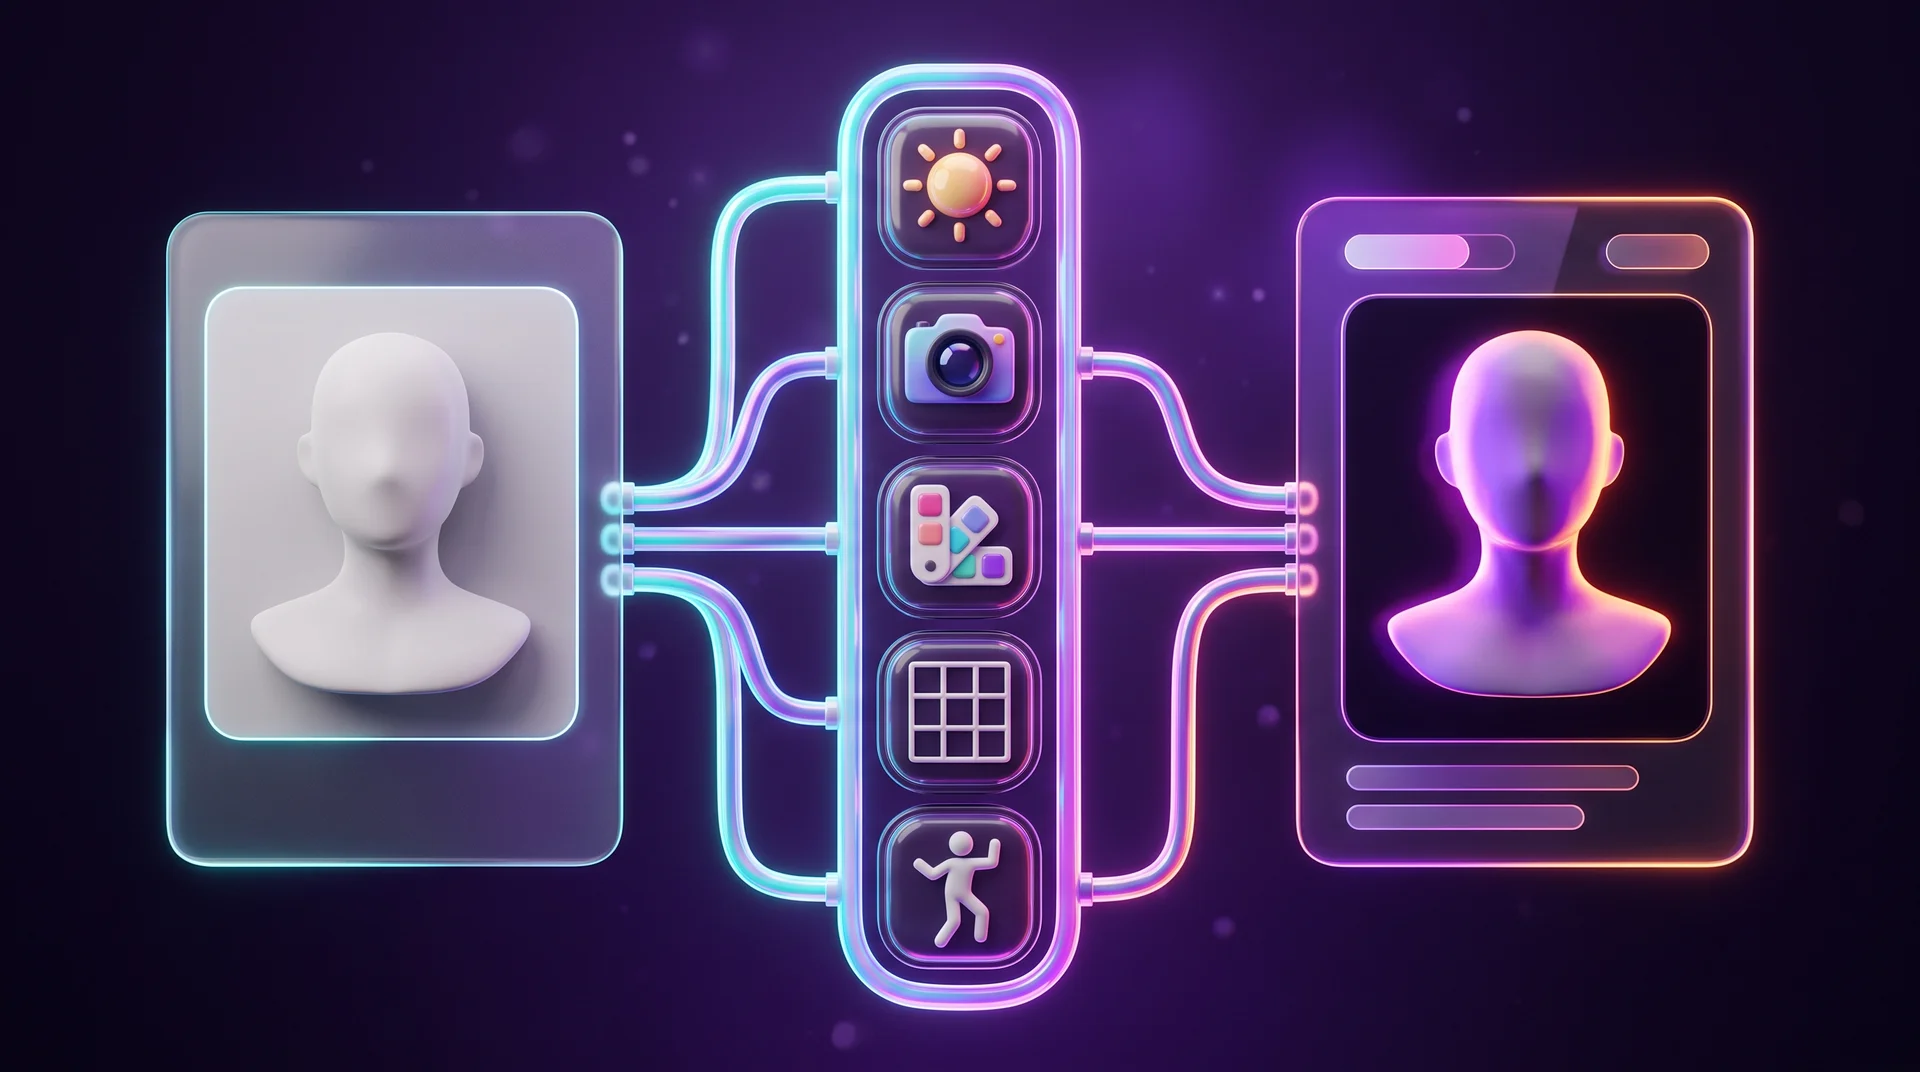
A good prompt isn't a rigid template that fits every case, but a checklist you work through from the essentials to the details. Start with the subject and their style, move on to the pose or action, the setting and composition, then describe lighting, camera, colors and style, and finally set the level of detail and the constraints: what to keep, what to change and what to leave out.
A universal structure for an AI photoshoot prompt:
- Subject: who is in the image: a woman, a man, a couple, a child or a character.
- Appearance and distinctive features: age, hair, facial features, build. When working with a reference, this is where you specify which details matter most to keep.
- Clothing and styling: clothes, shoes, accessories, makeup and hairstyle.
- Action: what the person is doing: walking, sitting in a café, holding flowers, looking out of a window.
- Pose: the position of the body, hands and head, gaze direction and facial expression.
- Location: where the shot takes place, background, interior, weather and surrounding objects.
- Composition: where the subject sits in the frame, how much space is around them, a symmetrical or dynamic frame.
- Shot type and angle: close-up, waist-up, full body or wide shot; at eye level, from above, from below or from the side.
- Lighting: natural or studio, soft or hard, its direction and the time of day.
- Color and style: palette, aesthetic, fashion, cinematic or editorial.
- Mood: calm, romantic, dramatic or energetic.
- Key details: fabric texture, jewelry, objects in hand, background features.
- Constraints: what must not be changed or added: keep the face, don't change the hair color, no unnecessary objects and no text in the frame.
For more accurate results, it's best to write the prompt in English. If English isn't your strong suit, draft it in your own language and ask a chatbot to translate it. Here's what a prompt following this structure might look like:
Generate a photograph. A 35-year-old woman with curly dark hair and a light linen shirt sits at a wooden table in a bright café, looking at the camera with a slight smile. Waist-up portrait at eye level, soft morning light from a window, warm natural palette, 50 mm lens, shallow depth of field. Photorealistic, natural skin texture, no text in the frame.
You don't have to fill in every item each time. If you upload a photo of a person, there's no need to describe their appearance: focus on what you want to change, such as clothing, pose, background, lighting and composition. And there's no point in a prompt several pages long: if you've already said you want a tree in the background, you don't need to repeat it again and again.
How to preserve the person's appearance from the source photo
Even when you upload your own photo, the model may change the face shape, age, proportions or certain features. That's because different models use the reference in different ways: for some it's the source of the person's appearance, for others only a reference point for style and composition.
Text alone won't preserve appearance 100%. For that you need dedicated tools, such as Midjourney's character reference parameters, or at least uploading the source photo to the tool. In the text itself it's enough to state basics like gender, age and hair color, so the model doesn't change them. A detailed description of the facial features you want isn't just unnecessary, it's harmful: the model tries to satisfy both the text and the image, and you end up with a "Frankenstein's monster".
Text-to-Image vs Image-to-Image
In some models the image serves only as a general style reference (Text-to-Image), not as the source of the person's identity. In that case no prompt will make the model keep your features, and you need dedicated face-transfer tools.
The better option is models that let you upload a reference photo (Image-to-Image), which becomes the main anchor for the person's identity.
The "keep, change, avoid" method
When working with a reference photo, build the prompt in three parts:
- Keep: what to carry over from the source photo, for example face shape, the line of the nose, natural pores and skin texture.
- Change: what the model should change, for example a new background, pose or lighting.
- Avoid: constraints that protect the appearance from distortion, for example don't change the facial proportions, eye color or age.
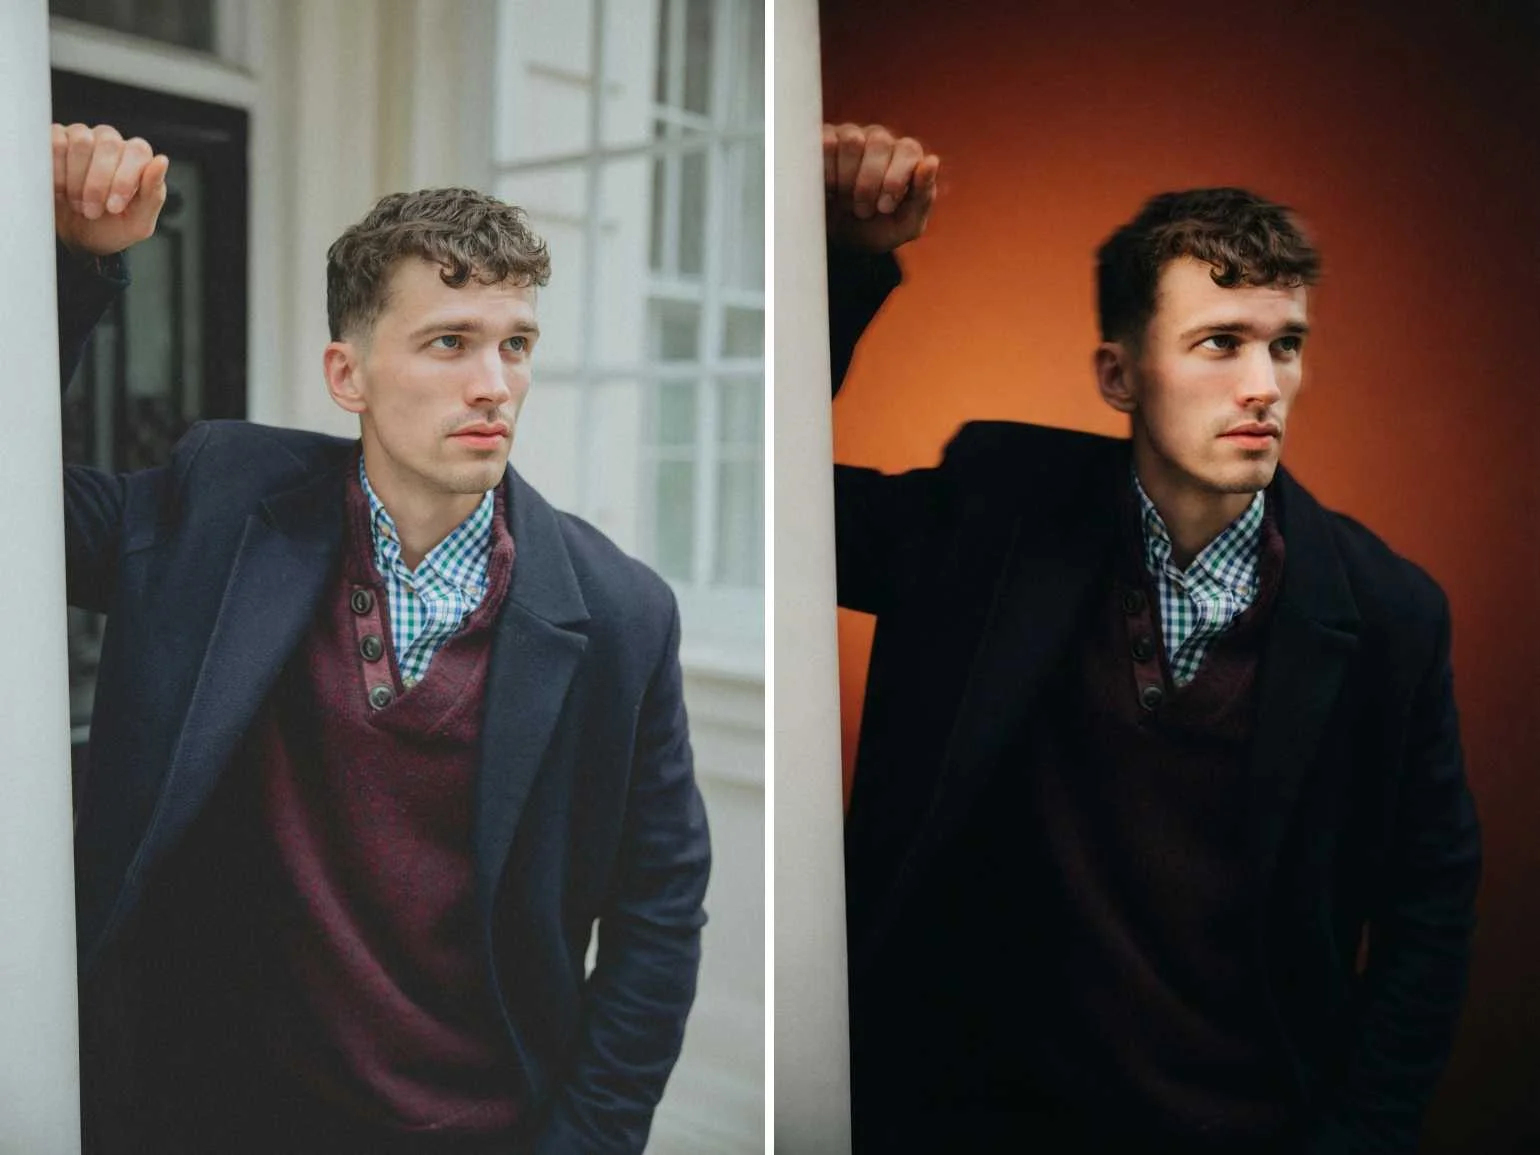
An example prompt that keeps the face and changes the lighting:
Take the person from the attached reference photo and keep their face completely unchanged: preserve the exact same facial features, skin texture, expression and head angle. Apply only these changes: intense side lighting from the left with deep shadows, a smooth warm gradient background from burnt orange to dark red. 85 mm portrait lens look, f/2.0, sharp focus on the eyes, cinematic film grain, editorial fashion photography style. Do not alter the person's identity, skin tone or facial structure.
Lighting, angle, lens and style
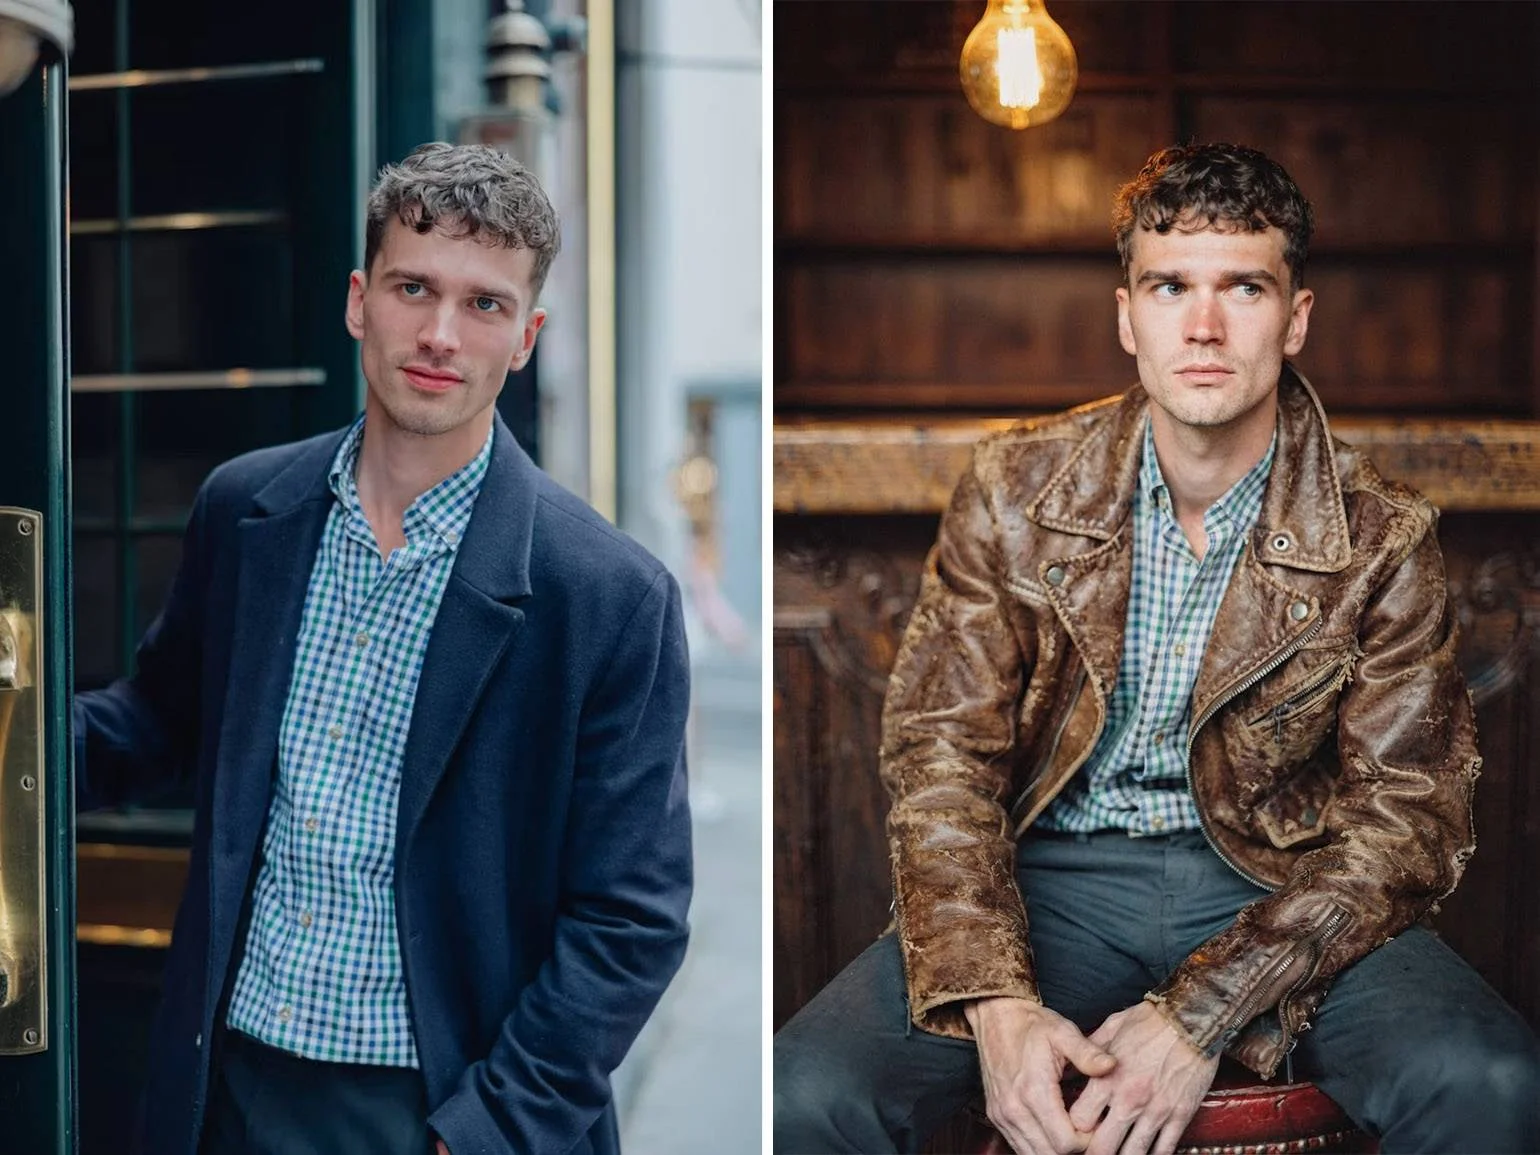
The same person can look completely different depending on the angle, lighting and shot type. These parameters set the mood of the image and also help control composition, proportions and how much the result looks like a real photograph.
- Distance and angle: specify the distance from the camera (face close-up, waist-up, full body) and the position (eye level, looking at the camera). Without these settings, the model starts improvising.
- Lighting and color: describe the mood you want: golden hour, studio lighting, a crisp autumn day.
- Lens and sharpness: to keep facial proportions from distorting, specify a 50 or 85 mm lens. To add depth, write "blurred background" or "shallow depth of field".
There's no need to copy every parameter from prompt to prompt like a fixed template. Each parameter is a tool for a specific job. When you just want to swap the background, clothing or lighting and keep the likeness, it's enough to describe what to change and what not to touch, and the model will fill in the angle, lens and color grading on its own. Spell out every parameter only when you want full control over the entire frame.
Constraints and negative instructions in a prompt
Sometimes you need to tell the model not only what you want, but also what it must not change or add. Models can interpret direct prohibitions in unexpected ways, though, so it's better to phrase constraints separately rather than pile them onto the request.
The most common mistake among people new to prompting is using the words "no" or "without". If you write "a woman without glasses", the model will likely "see" only the word glasses and add them to the image.
- Use a dedicated field. Some tools have a field called Negative prompt or "what not to show". There you list, separated by commas, what shouldn't appear in the image: glasses, text, watermarks.
- Describe the result you want. Instead of "remove the redness from the face", write "even, healthy skin tone".
- Don't overdo the constraints. A long list of prohibitions blurs priorities, and the model starts ignoring some of the instructions.
- Put the critical requirement at the start or the end. A requirement like "keep the face" is worth emphasizing and, if needed, repeating in a separate short sentence.
How to choose a good source photo
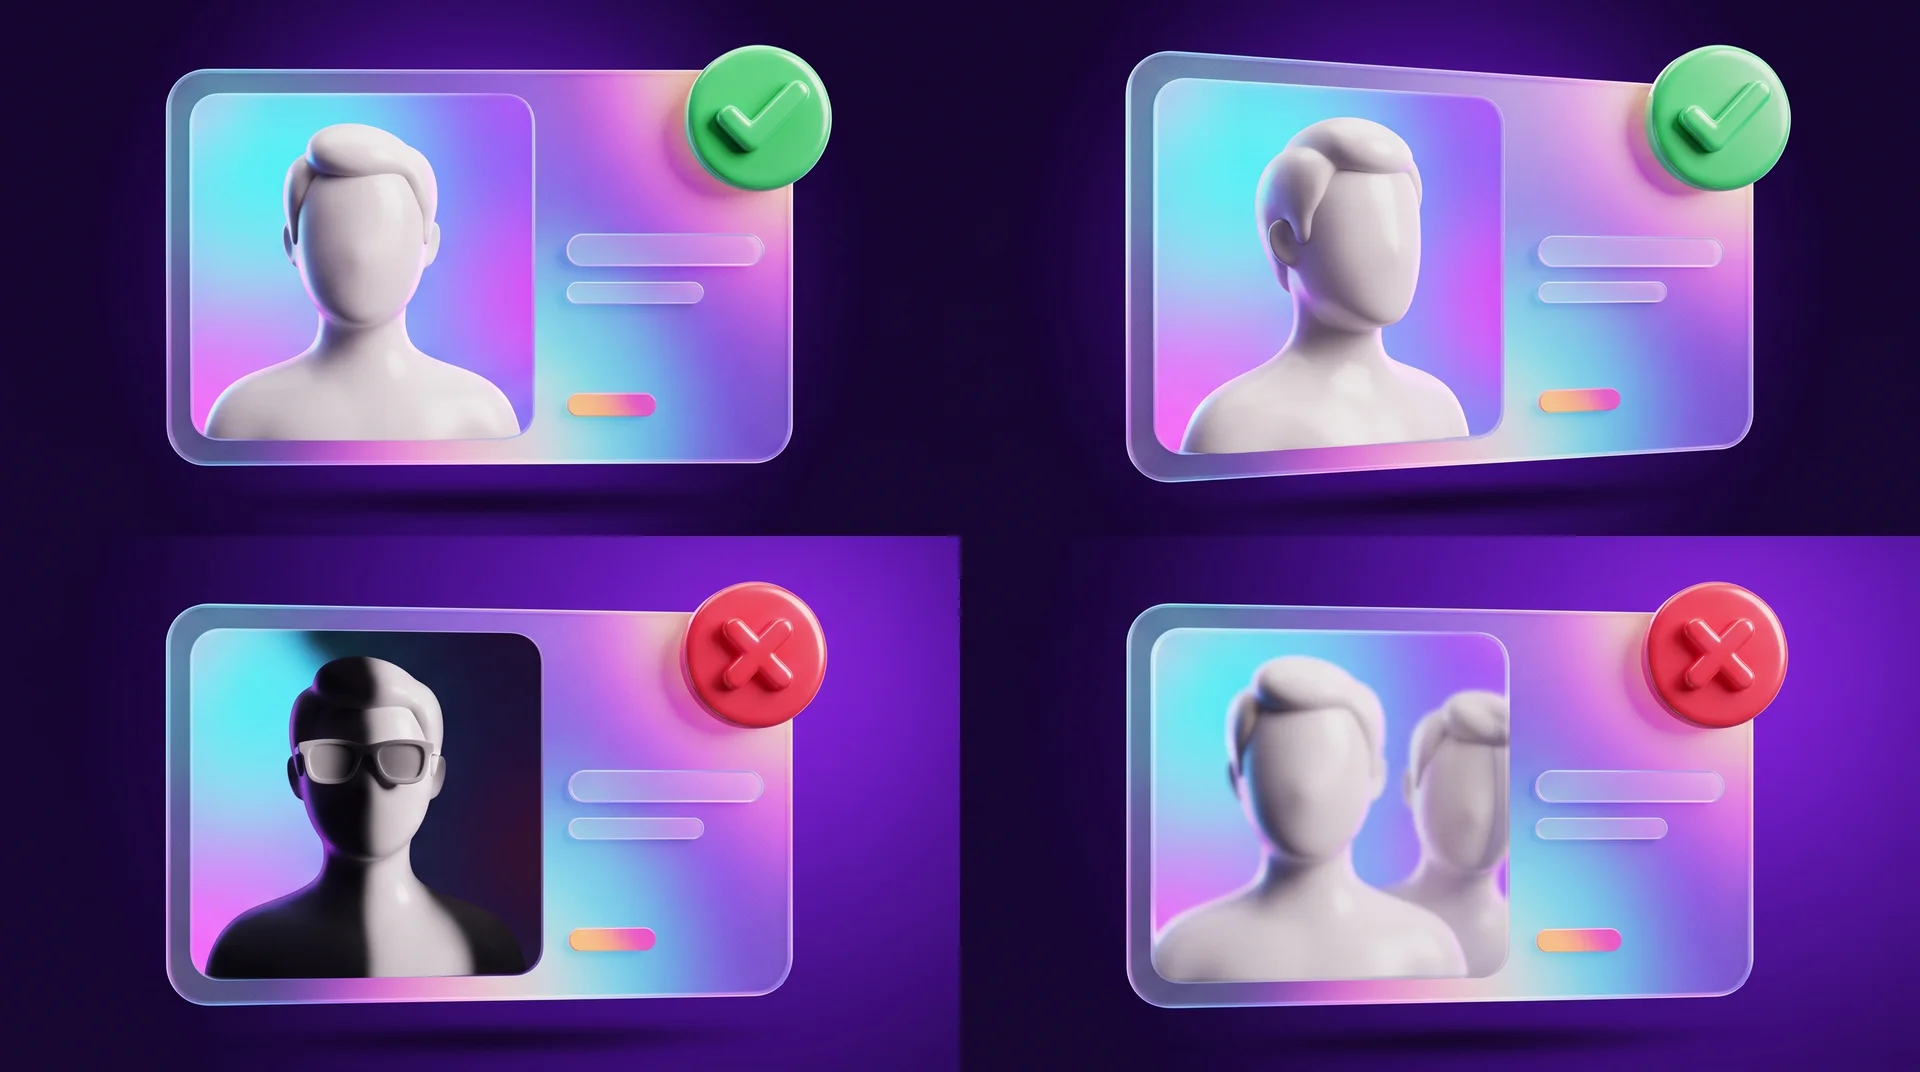
The clearer the person's appearance is to the model, the easier it is to preserve it in the new frame. So for a reference, choose a photo where the face and natural features are clearly visible, and the lighting, angle and quality don't get in the way.
- Lighting: no harsh shadows on the face, just soft, natural light. Light-bulb lighting can distort skin tone.
- Angle and expression: looking straight at the camera or with a slight head turn, so three-quarters of the face is visible. A neutral expression or a slight smile, like in a passport photo.
- Distance from the camera: a close-up down to the shoulders or a waist-up portrait. The main thing is that the face is sharp and fills most of the frame.
- Quality: no heavy retouching, filters, blur or compression. The more natural the skin, the better the model understands the person's individual features.
- Background: no other people in the frame. The model handles the rest of the background just fine.
To transfer a face into a finished image, one photo is usually enough. If the service lets you upload several references, upload 3–4 photos from different angles: that way the model grasps the volume of the face and doesn't "flatten" the features at an unusual angle. To train a model that draws the person from scratch in different poses, you'll need dozens of photos with different angles, lighting, distances and expressions.
How to adapt a prompt for ChatGPT, Gemini and Midjourney
The universal structure works in almost any tool, but different models will read the same request differently. Some work better with natural, detailed descriptions, others with short, structured instructions and a separate field for negative instructions.
- Midjourney likes literary, artistic language: an emotional description of the scene, from which the model fills in details itself.
- Stable Diffusion likes clarity: comma-separated lists and detailed negative prompts. Emotional text it probably won't understand.
- ChatGPT and Gemini understand natural sentences well and let you refine the image in conversation, step by step.
The tools are updated constantly, and it's hard to keep up with every change. At first, the simplest approach is to write one prompt and ask a chatbot like ChatGPT, Gemini or Claude to adapt it to the service you're using.
Why the result isn't good and how to fix it
Even a detailed prompt doesn't guarantee a good result: the model can lose some of the instructions along the way, mix up contradictory requirements or interpret the references differently from what you planned. These are the four most common mistakes:
- A prompt in a language the model understands less well. Some models, like Nano Banana, handle many languages well, but most models are more accurate with requests in English.
- Contradictory requirements. Don't ask in the same prompt for "dark noir lighting on a bright sunny day". The model will pick a random parameter or blend them.
- Trying to fit everything into one prompt. A long prompt with lots of details makes the model ignore parts of it. It's better to break it down: first the basic changes to the frame, then fix the details in the next prompt.
- Uncontrolled mixing of references. Uploading photos of different people to get "an improved version of yourself", with a short prompt like "transfer from one image to the other", leads to an averaged look or distortions. At the very least, specify what to keep and exactly what to take from each photo.
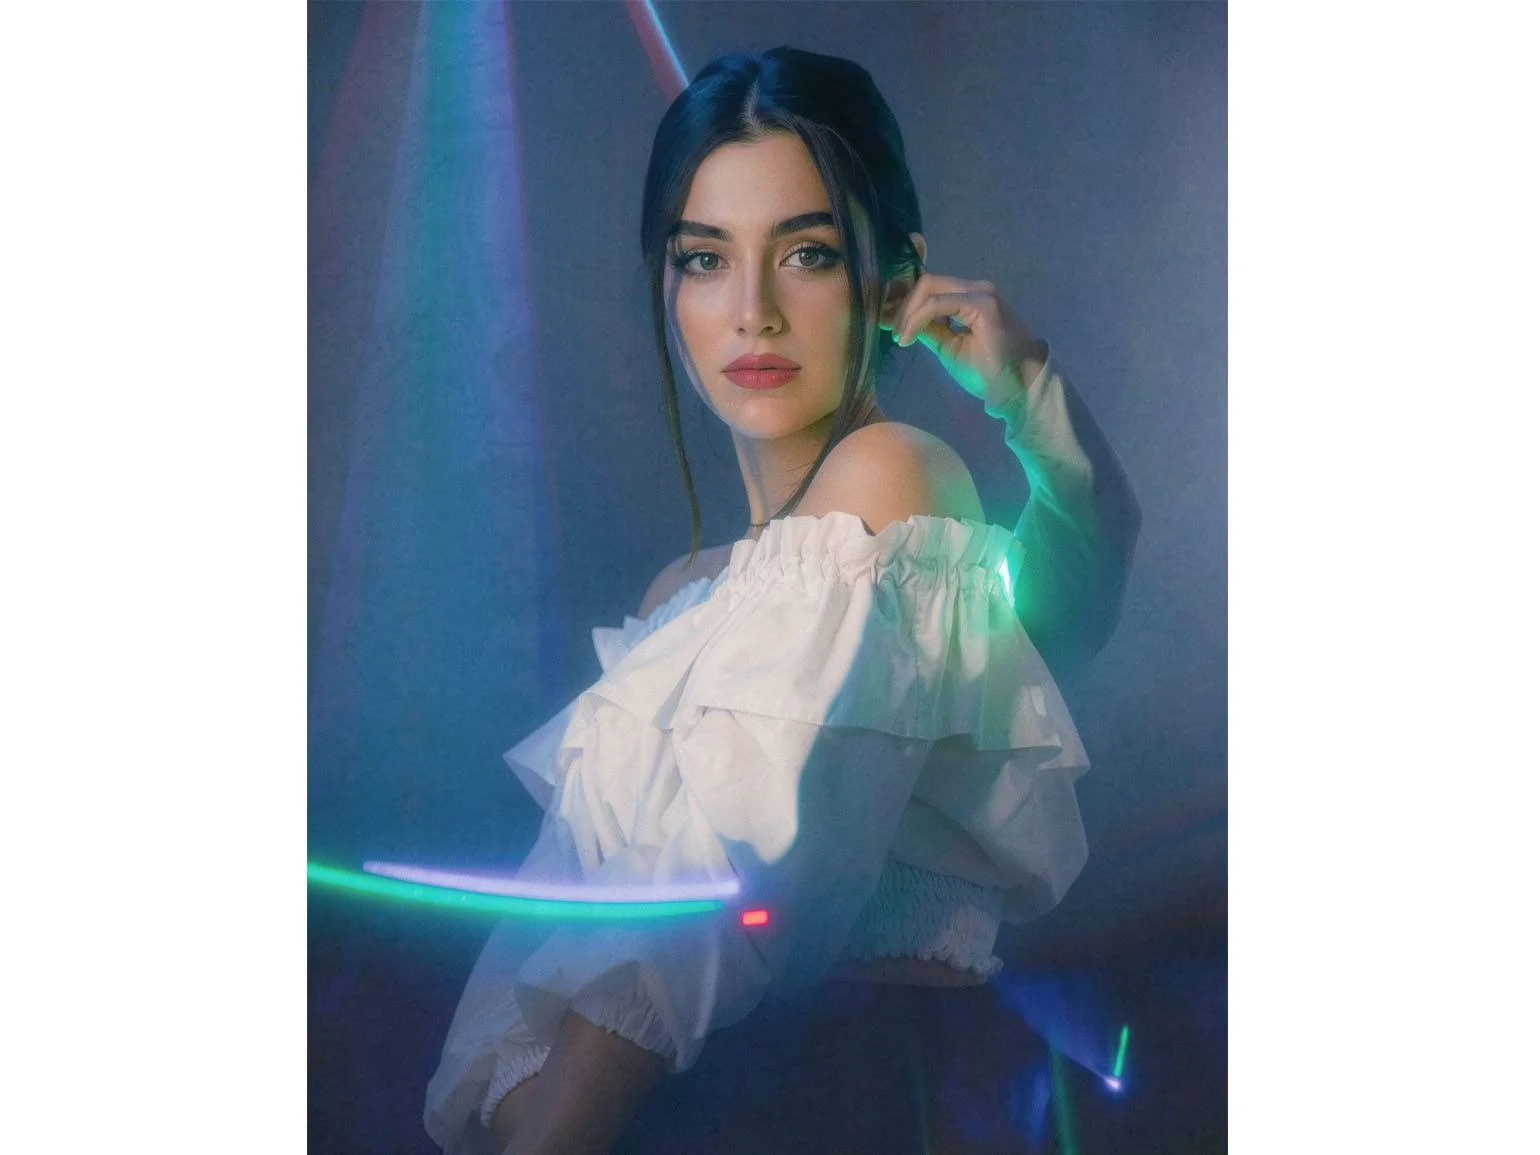
How RJL Studio uses AI photoshoots for businesses
At RJL Studio we produce visuals for brands and campaigns with AI: product images in new settings, ad creatives, social media content and landing page imagery, all in a consistent visual language that fits the brand. Every image goes through a human check for likeness, distortions and fit with the brief, and we only work with photos of people with their consent. For visuals to work, they need to fit into a broader plan: we cover that in our guide to AI marketing strategy.
Want visuals that look like a professional photoshoot, without the shoot days? Read about our creative services, our paid campaigns and social media marketing, or get in touch and we'll get back to you.
AI photoshoot FAQ
Can AI photoshoots replace a professional photographer?
For some tasks, yes: social media images, campaign variations or new backgrounds for existing photos. When you need a perfect likeness of a real person, an exact product shot or a large production, professional photography still gives a more reliable result, and the two are often combined.
What language should I write an image prompt in?
Most models are more accurate with prompts in English. You can draft the idea in your own language and ask a chatbot to translate it and adapt it to the tool you're using.
How many source photos do I need?
To transfer a face into a new image, one good photo is usually enough. If the tool allows it, 3–4 photos from different angles will improve the likeness. Training a personal model takes dozens of photos.
How do I keep a real person's face in the image?
Use a tool that accepts a reference photo (Image-to-Image), write the prompt using the "keep, change, avoid" method, and state the requirement to keep the face at the beginning or end of the prompt.
Can I use AI images of real people in advertising?
Get consent from the person shown in the image and check the terms of use of the tool you created it with. For commercial campaigns, document those approvals in advance.
Disclaimer: blog content is for general information and learning only and is accurate as of its publication date. It is not professional, legal, financial or business advice, nor a recommendation or call to take any action. Any use of this information is at the reader's own risk, and we accept no liability for any resulting loss. Links to external websites and tools are provided for convenience only. We recommend consulting a qualified professional before making decisions.